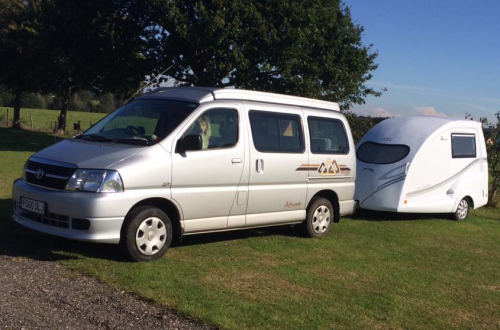
Pod Life!
Posted on

Posted on
Posted on
Posted on
We asked new Go-Pod owners Cherie & Ricky to send us an account of their winter Podding adventures and here's what they had to say...
"This is Our Go-Pod Journey.
|
Posted on
Relatively new to the Go-Pod set are Alison & Brian, although that doesn't mean they haven't spent a considerable number of nights away already.
Brian is also a dab-hand with the camera and sent in some beautiful photos of their Highland adventures. Here's what they say...
"For us the Go-Pod is a wonderful step up from a tent, having camped for a number of years.
The size makes it so easy to tow. It just glides along with the car. We picked up ours in June last year and so far, we've been away around 30 nights, Which is testament to how easy it is to get away with a Go-Pod!
We’ve been to Mull, Fort William, Glencoe, Glenmore (near Aviemore) and also enjoyed an overnight at a wee place called Stronachlachar, staying on the pier itself. This is the sort of thing you can do with a micro-tourer Go-Pod. We went for 16 miles on a single track road and it was absolutely no problem towing it, even when meeting cars coming the other way.
We all sleep very comfortably on the bed, 2 adults and a Springer Spaniel.
One of our best buys ever!"
Posted on
Although cleverly compact, Go-Pods are enjoyed by plenty of tallers Podders!
With the pop-top providing standing room of over 6ft and the generous bed which measures 6ft 2in at it's longest point, the Go-Pod is larger inside than you might think. And with a growing number, (no pun intended), of customers, some up to 6ft 4in it's certainly worth a closer look.
A video link follows & here's what some of our exisiting owners have to say;
For more height related reviews type or paste Go-Pod 6ft2 in to YouTube!
Posted on
It’s important to secure your jockey wheel properly while using your Go-Pod and here are a few tips on how to overcome some common issues.
On this example shown, the bracket has been clamped up too low down on the jockey wheel. It should be clamped around the larger diameter top part.
However, it is also possible to tighten the jockey wheel clamp on the larger diameter tube but still have it looking crooked like this.
The arrow labelled '1' in the photo below shows where the clamp should be ideally.
To correct any issues like this, we suggest supporting the front end of the Go-Pods hitch using something that is substantial enough to take its weight. A axle stand, block of wood or bricks maybe. Take suitable care with this and ensure the handbrake is applied.
With the support in place wind the jockey wheel up, so that the whole weight of the Go-Pod now rests on the support you prepared, thus raising the jockey wheel up in to the air.
If the smaller diameter tube is over extended, continue winding until most of it is inside of the larger diameter outer tubing.
Once the jockey wheel is off the ground you can release the clamp lock, (number 4 on the photo), taking care not to drop it on to your toes!
You can then ensure the larger diameter tube is correctly positioned in the clamp.
TIP! Wiggle the jockey wheel as you re-tighten the clamp lock, to ensure it is straight & properly seated in the clamp. Clamping it up wonky is a common issue as is failing to tighten the clamp suffeciently - as they can begin to work loose unless if they're not properly tightened.
With the jockey wheel adjusted and the clamp tight, wind the handle, (3), again so that the wheel touches the floor and jacks your Go-Pod up, off of the support. You can now remove the support.
A jockey wheel that is clamped crooked, will often jump straight suddenly, (as you move around inside), and will result in the clamp becoming loose. This can cause the front of the Go-Pod to drop without warning and although alarming, this is not normally detrimental.
If this does happen, just re-set your jockey wheel is the way described above. Jockey wheels are seldom faulty and the majority of issues are user related.
If in doubt, please contact the After Sales Department on 01704 889973.
Posted on
Chassis Plate Update - 2018 models only.
Red Lion Caravans Ltd have released a chassis plate update. The plate reflects the higher 1000Kg MTPLM that was introduced for 2018 models.
If you own a 2018 model and would like to receive an updated chassis plate, please contact Nicci Taylor on [email protected] with your chassis number and full postal address.
NOTES:
Only applicable to 2018 Go-Pods with chassis plates displaying 750Kg MTPLM - on models purchased pre-September 2018.
The amended plate will display the MTPLM as 1000Kg.
A new plate is only required if you intend carrying heavy loads that will push the total weight of your Go-Pod & contents to over 750Kg.
We recommend Platinum model owners apply.
The combined weight for your Go-Pod & contents should not exceed the tow vehicle's braked towing allowance.
It is the the towers repsonibility to ensure they conform to towing regulations.
Posted on
This video provides tips and advice for changing the wheel on your Go-Pod.
The Standard, PLUS and Platinum models all come with a full spec spare wheel and tyre as part of the package.
You will need your own spanner to remove the spare and a suitable jack. In most cases, the jack that comes with your car can be used.
Posted on
NB: This item is currently unavailable.
We had this recent request for help with the awning and thought it might be useful to share it and the reply:
Q:
"I would like some advice on the best way to fit the awning to my Go-Pod please. Any tips would be gratefully received!"
A:
Most owners take the awning's two front guy ropes and tie them forward to the Pods' front grab handles, as shown in the photo below. Ensure both ropes are the same length and tie them off so that the fabric of the awning stays just shy of the Go-Pods pop top opening. That way the awning won't foul the pop top if you need to close it in bad weather. The ropes should lie along the top surface of the Go-Pod and not be diagonally crossed.
Some people use simple 'S-hooks', (as shown below), to fix to the handles, so that it’s quicker and so the guy ropes are always the same length, every time. Others mark the guy ropes so ther is a visual indicator of where to tie them off.
1. Errect the awning so that it's a free standing structure & ensure it looks aligned straight from the rear of the Pod.
2. Affix the front ropes to the grab handles as explained above & shown below.
3. Peg down only the open ends of the elasticated tunnel section, placing the pegs well underneath the Go-Pod itself - near by the stabiliser legs - on both sides. This will secure the bottom part and keep the elastic sides nice and tight.
4. Walk the whole awning structure backwards, away from the Go-Pod until the tunnel goes nice and tight. Ensure that the whole structure stays as straight and as squarely aligned as possible.
5. Peg the whole thing down.
TIP: Taking the two rear guy ropes from the very back of the awning, peg them down tightly in a backwards direction, away from the Go-Pod. So in other words, directly backwards in a straight line. This has the affect of further tightening the tunnel section.
[Do not peg down the whole awning first and move the Go-Pod towards it! I have heard this suggested and it's a certain recipe for disaster!]
We recommend that the doors and the inner divider of the awning be zipped shut before peg down the awning's legs. This will ensure you'll be able to unzip them easily after pegging. Stand back and check if it looks right before proceeding to peg it down further and adjust if necessary.
Pegs are provided with the awning but it's a good idea to take some extra, metal hardstand pegs and a decent club hammer. Those are the pegs that are like 6” nails & work in every scenario.
Watch that the webbing straps between the awning's legs aren't wrapped around the feet and that they are as taut as possible when you peg it.
Its normal for it be a little different each time, due to the lay of the land and so on but with some care & practice, you'll find its a really great awning, even in pretty strong winds!
Additional info:
Some people add a strip of awning bead to the top of the tunnel end, instead of using the forward guy ropes method. Having tested both ways, we feel that neither has any major advantages and that this is a matter of personal preference. Stitching a bead in place is best done with an industrial sewing machine, while stretching the elasticated section out flat.
We did work with Khyam one season to produce a special Go-Pod version of the awing which had awning bead attached and the Go-Pod logo. However, as the production quantities we were able to order were relatively low, this was dropped when the item became outpriced. The regular Khyam awning supplied now is offered at the same RRP as the manufacturers and is included within the PLUS and Platinum models.
Posted on
Measurements for pre-2019 Go-Pods follows - please review the important footnotes.
2018 Models
External Dimensions:
Length | - | 4.20m including 0.99m hitch & bar. |
Width | - | 1.85m |
Height | - | 2.05m roof down. Raising pop top adds 30cm. |
*Note regarding garage storage | - | Recommended minimum clearance - 210cm. |
MiRO | - | 490Kg (Actual Mass = 575Kg) Based on Standard model. |
Brakes | - | AL-KO Braking System. |
MTPLM | - | 750Kg / 1000Kg |
Nose Weight | - | 49Kg (54Kg with front box & gas bottle plumbed) |
Ground Clearance. | - | 183mm NB: Lowest point is the removable spare wheel. |
Internal Dimensions:
Standing height | - | 1.84m |
Floor - full length | - | 2.05m |
Floor - width | - | 0.62m |
Floor - bed end of aisle to door | - | 1.00m |
Bed - length | - | 1.95m |
Bed - width as double | - | 1.57m |
Bed - width as single | - | 0.53m |
Door - width | - | 0.60m |
Door - height | - | 1.58m |
Dimensions: Pre-2018 Models
External Dimensions:
Length | - | 4.20m including 0.99m hitch & bar. |
Width | - | 1.85m |
Height | - | 2.05m roof down. Raising pop top adds 30cm. |
*Note regarding garage storage | - | Recommended minimum clearance - 210cm. |
MiRO | - | Varies with model & each unit's spec. |
Brakes | - | AL-KO Braking System. |
MTPLM | - | 750Kg |
Nose Weight | - | 49Kg (54Kg with front box & gas bottle plumbed) |
Ground Clearance. | - | 183mm NB: Lowest point is the removable spare wheel. |
Internal Dimensions:
Standing height | - | 1.84m |
Floor - full length | - | 2.05m |
Floor - width | - | 0.62m |
Floor - bed end of aisle to door | - | 1.00m |
Bed - length | - | 1.95m |
Bed - width as double | - | 1.57m |
Bed - width as single | - | 0.53m |
Door - width | - | 0.60m |
Door - height | - | 1.58m |
Notes:
More information and specs on current models can be found on each model's page at: www.2berthcaravan.co.uk
Measurements and weights shown are intended as a guide and may vary, be approximated or estimated where necessary.
Due to the manufacturing process, each Go-Pod may have some variation in it's dimensions and therefore the sizes & weights shown are approximated. This is due to variation between moulds and the thickness of the GRP applied.
We therefore recommend that adequate tolerance is allowed if your storage area is limited.
These measurements superceed all previously published specs.